So, I finally got the confidence to begin writing publicly. Let me thank DEV.to and the fantastic community around it for motivating me and inspiring me to start doing this.
As cloud computing becomes more popular, we begin to employ it for nearly every use case. For example, we're too lazy to just create a new VM in the cloud and pay per usage as in the pay-as-you-go model, rather than just installing a supervisor and use it to manage as much VMs locally as we need and all free of charge since we are using our own resources instead of someone else's (the cloud provider).
In this tutorial, we will use Oracle VirtualBox to create a VM that runs the latest LTS version of the Ubuntu Server distribution (v22.04), alternatively, you can use any other disto you like but be aware that the instructions may slightly differ but the concepts are the same.
1. Download the Supervisor and the Guest OS ISO file
In order to follow up, you must first install VirtualBox from the official website. The installation is very simple and straightforward.
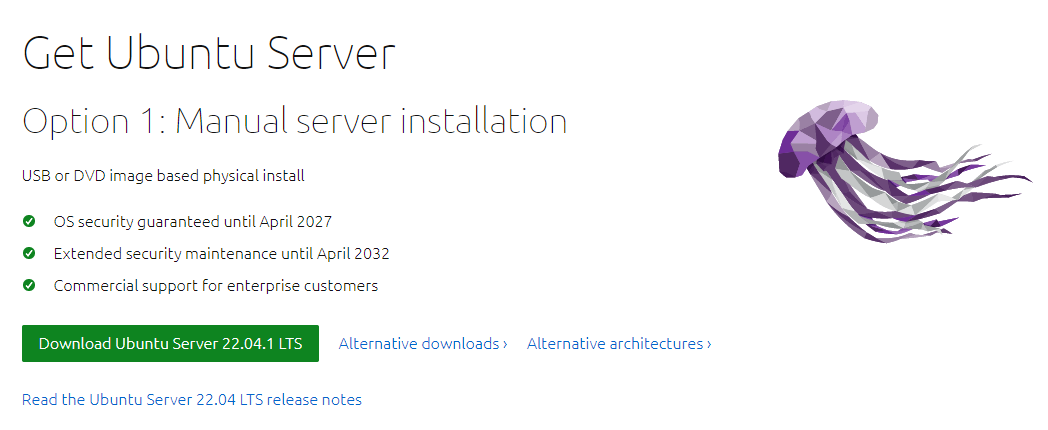
Now, we must download the ISO file of the image we are going to install in the VirtualBox machine as our guest OS. Just head to the official page and click on the featured button, then wait for the download to complete.
2. Create a Virtual Machine
Run VirtualBox and click on New to create your VM:

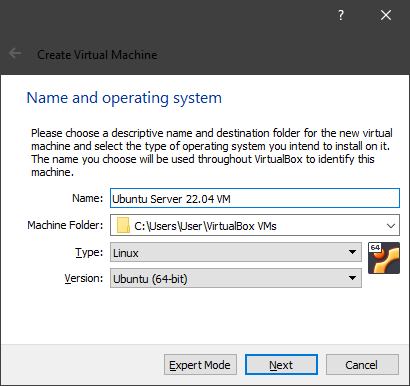
Give the VM a name, select the location where you want the disk image to be saved, then select the OS type and version (Linux and Ubuntu 64-bit in our case):
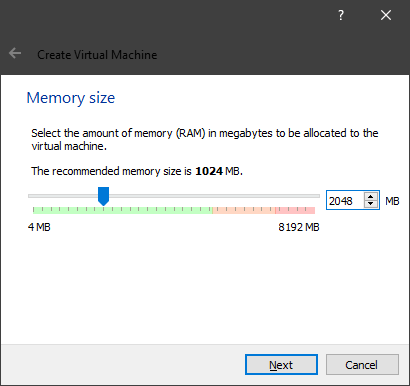
Next, select how much of your memory you want to allocate to the VM; I have 8GB of RAM and will set 1/4 of it (that is 2GB or 2048 in MB) which will be more than sufficient for a Ubuntu Server disto:
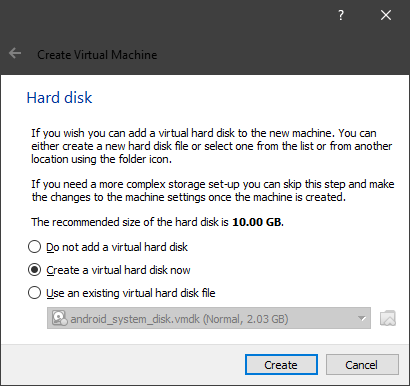
In the next four steps, we will select the defaults "Create a virtual hard disk now" and "VDI (Virtual Disk Image)", we will also keep the "Dynamically allocated" option which will allow us to have a dynamic disk size that grows as needed and not a fixed one that reserves the host disk space and cannot change once the VM is created, and finally the disk size to 10GB and the location set previously:
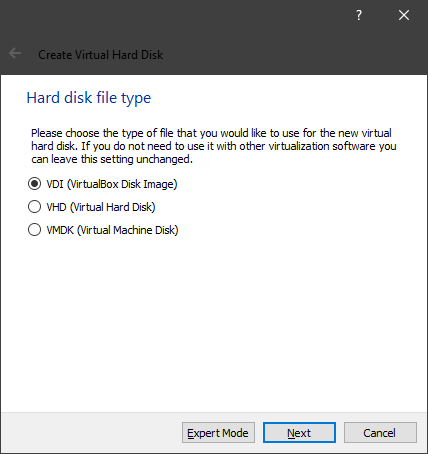
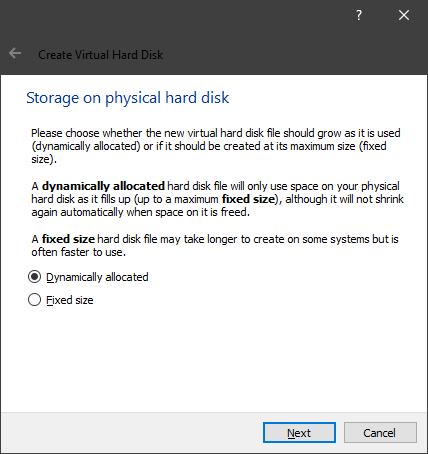
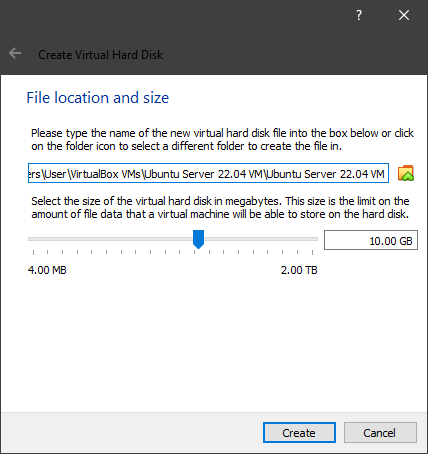
Note that the recommend system requirements for Ubuntu Server according to the official Ubuntu website are: 1GHz of CPU or better, 1GB of RAM or more, and a minimum of 2.5GB of disk space.
3. Install the Guest OS on the Virtual Machine
Now that the VM is created and its virtual specs are set, we will power it on by clicking on the "Start" button or "Normal Start" option:
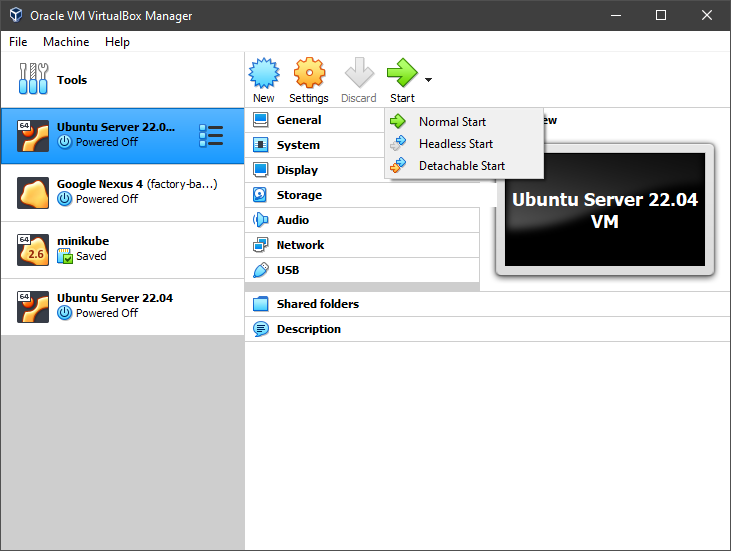
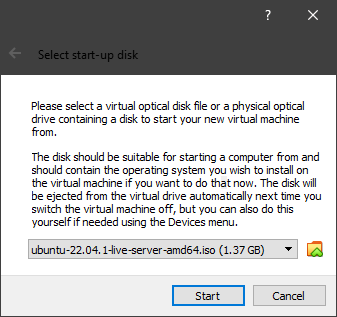
Select the ISO file we downloaded earlier to use as start-up image and click on Start:
The next steps in brief:
- Select "Try or Install Ubuntu Server" and wait for the installation to complete.
- Select your preferred language, and keyboard layout afterwards.
- For the installation base, we will keep Ubuntu Server (non-minimized).
- The network connection and proxy configuration will stay as it is by default.
- The Ubuntu archive mirror as default as well which will result in lower latency since we are downloading from the nearest servers.
- Next, we will use the entire disk (we are referring to the guest machine virtual disk and not the host's).
- In "Storage configuration", we will select "Done" and "Continue".
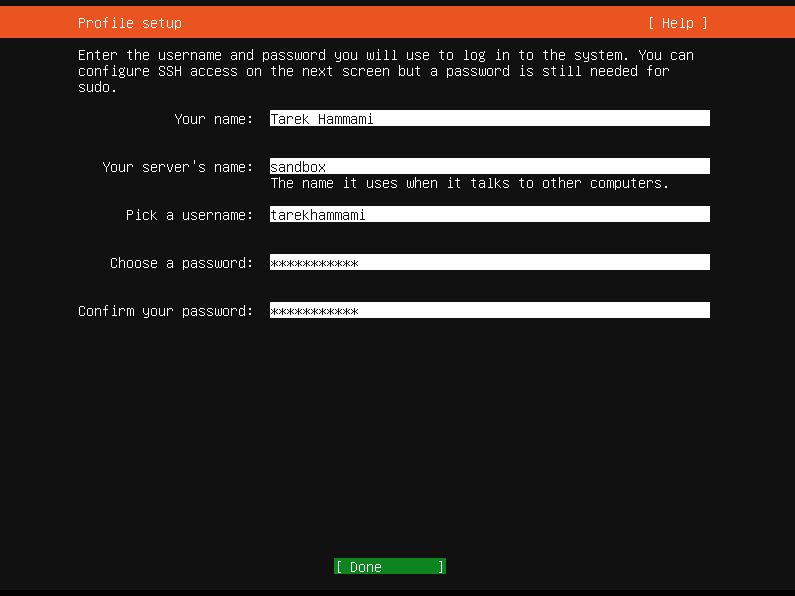
Now, you'll be prompted to set your profile setup. Enter your name and server name, then your username and password which you will use to log in to the machine.
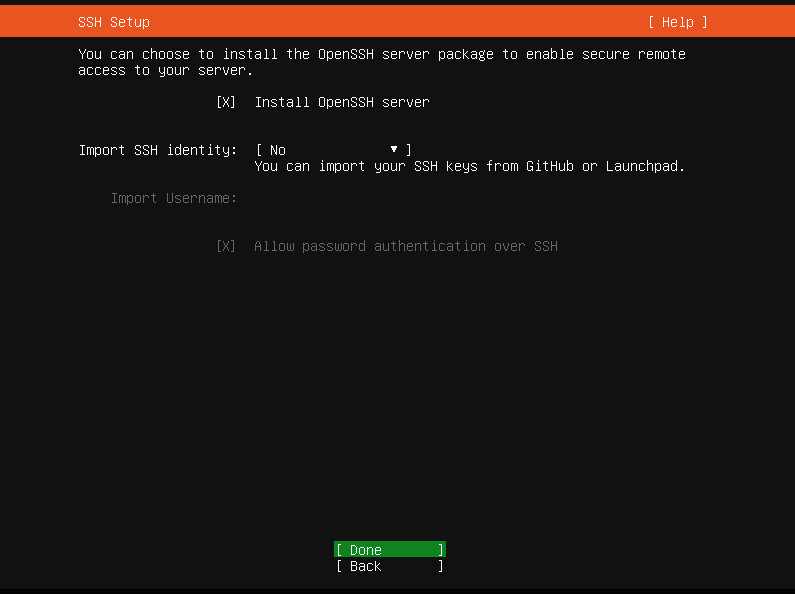
Next, in the SSH setup page, toggle on "Install OpenSSH server" that will install the openssh-server package for us which will allow us to use SSH later.
In Featured Server Snap, just click on "Done" since we don't need any of the packages listed there.
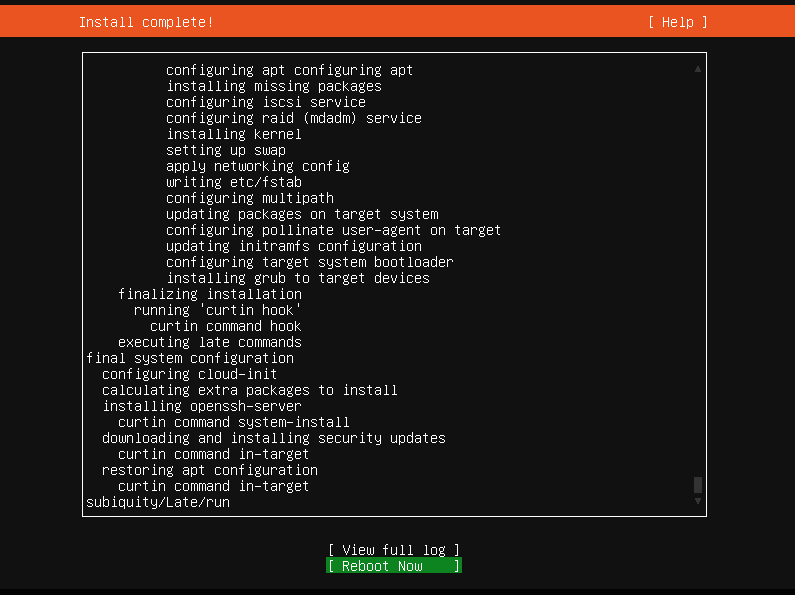
Now wait for the system installation to finish and reboot.
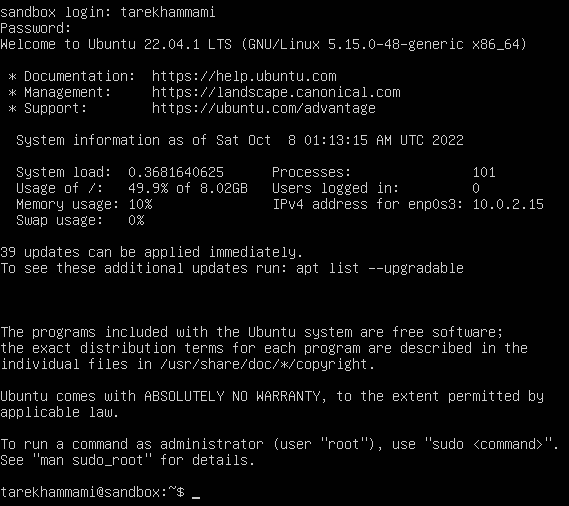
We are now able to use our username and password to log in:
4. Connect to the Virtual Machine using SSH
Now, let's check if the openssh-server package is properly installed:

If not, you can simply run: sudo apt install openssh-server
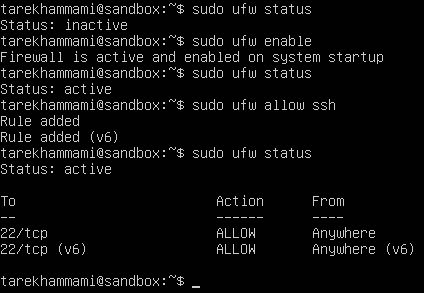
We can optionally enable the firewall and set rules that will allow only SSH connections:
Next, we'll set up port forwarding in order to be able to access our VM from the host machine. We will bind the VM's 22 port (SSH) to the host machine's 3022 port. To do so, select your machine and open its settings page, head to the "Network" tab and click on "Advanced", then select "Port Forwarding" and add a new record:
Name: ssh
Protocol: TCP
Host Port: 3022
Guest Port: 22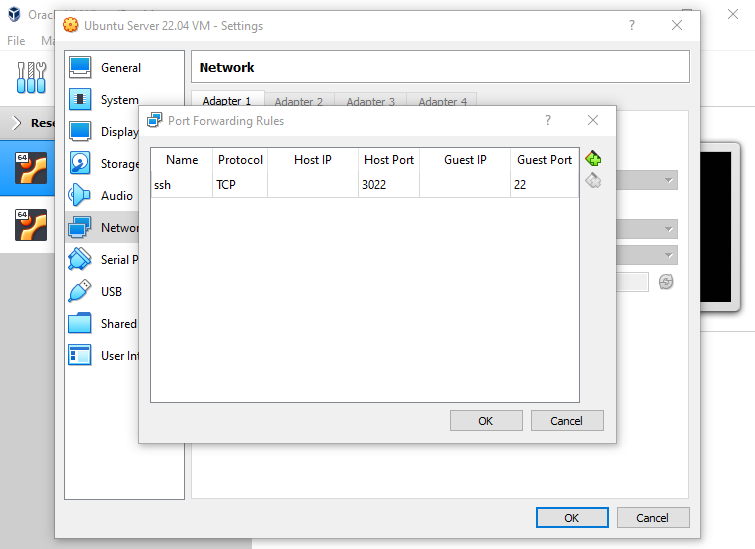
Now, it's time to turn off our machine and then restart it in headless mode and use SSH to connect to it.
To shut it down, we'll run: sudo shutdown -h 0
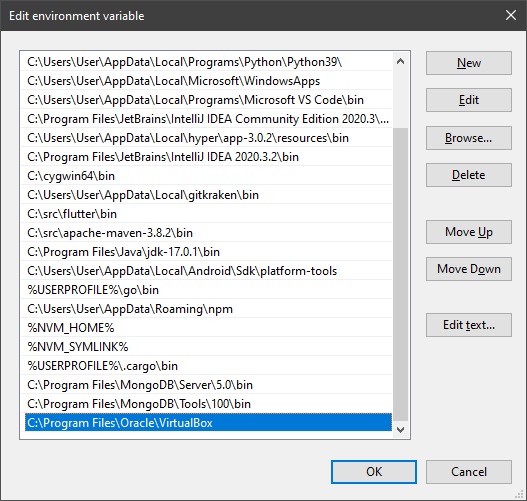
We have to add VirtualBox's path to the PATH environment variable in order to be able to use its command line tools anywhere such as VBoxManage command to manage our VMs.
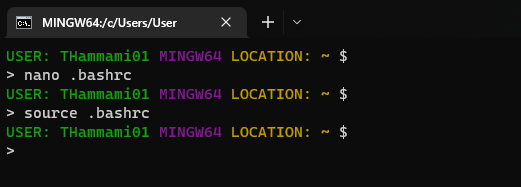
We will switch to the host machine's command line that is in my case is Windows Terminal. I prefer to use aliases always so that I don't have to remember the full command. So I'll set them in the .bashrc file (Bash run commands file; contains a list of commands that run every time we start the shell) since I am using Git Bash in Windows (any operating system has this file or something similar):

Then we will run source .bashrc for those updates to take effect.
It's time to connect to our machine, all we have to do is to run the alias start-sandbox command that we've just set in the last step, wait for it to power on and connect to it using ssh-sandbox:
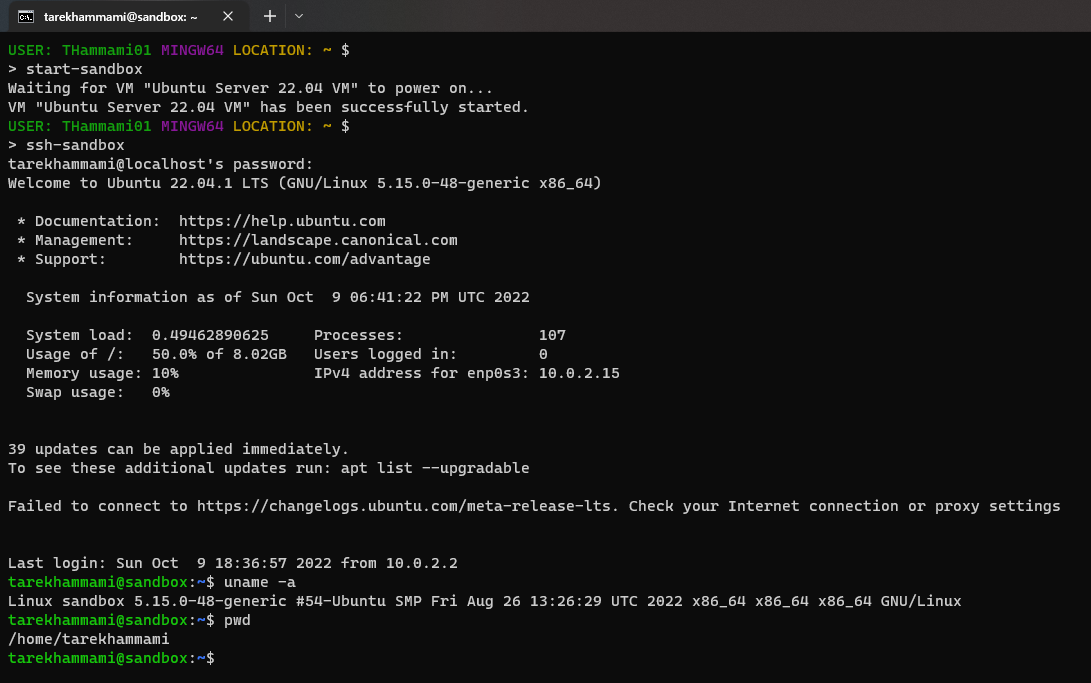
Once again, to turn off the VM, SSH into it and run sudo shutdown -h now.
5. Run a Simple Web App using Docker and Nginx
To install Docker, run the following commands in row (following the official docs for Docker installation on Ubuntu):
sudo apt-get remove docker docker-engine docker.io containerd runc
sudo apt-get update
sudo apt-get install ca-certificates curl gnupg lsb-release
sudo mkdir -p /etc/apt/keyrings
curl -fsSL https://download.docker.com/linux/ubuntu/gpg | sudo gpg --dearmor -o /etc/apt/keyrings/docker.gpg
echo \
  "deb [arch=$(dpkg --print-architecture) signed-by=/etc/apt/keyrings/docker.gpg] https://download.docker.com/linux/ubuntu \
  $(lsb_release -cs) stable" | sudo tee /etc/apt/sources.list.d/docker.list > /dev/null
sudo apt-get install docker-ce docker-ce-cli containerd.io docker-compose-plugin
sudo service docker start
After this step, Docker service must be running successfully:
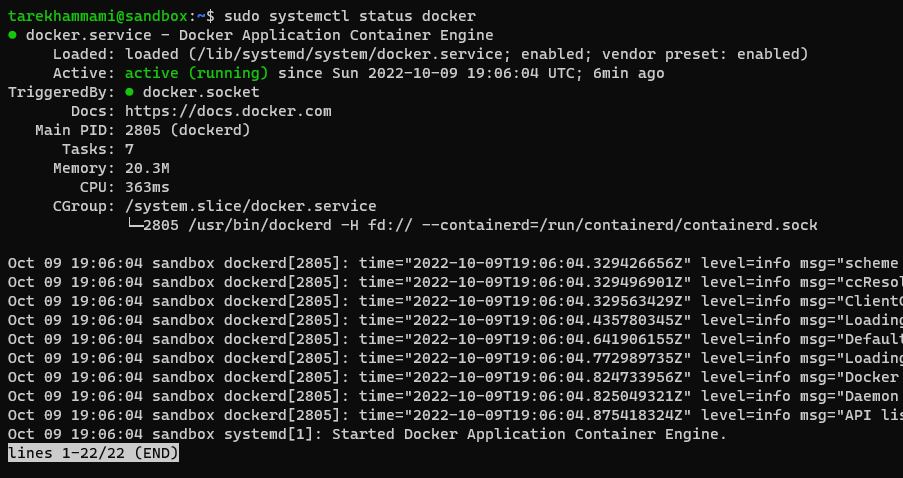
And now let's run docker run --name mynginx1 -p 80:80 -d nginx to run the app and then curl http://locahost:80 to view it as raw data.
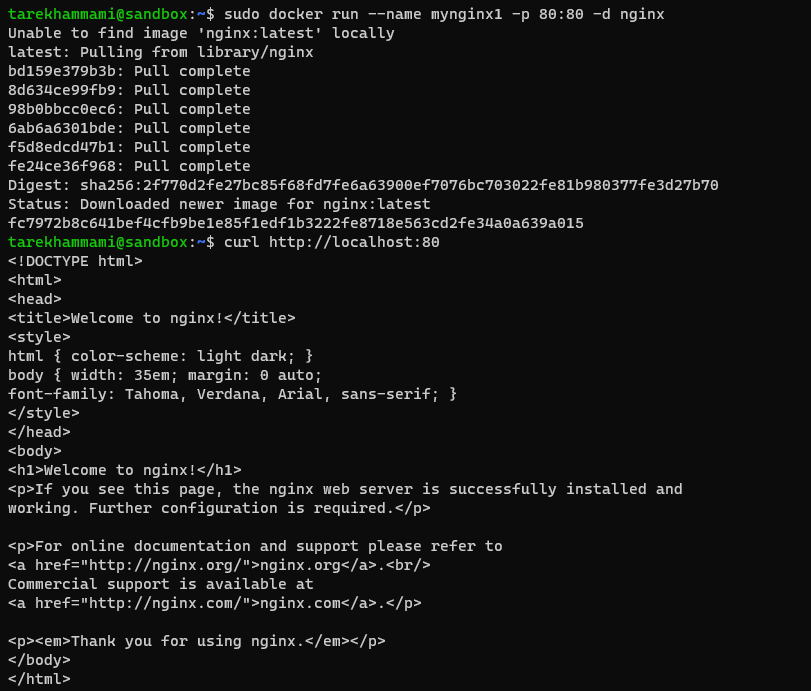
Another way to view the page is to install the Lynx text-based browser that runs inside the terminal sudo apt install lynx and
use it to view the page lynx http://localhost:80:
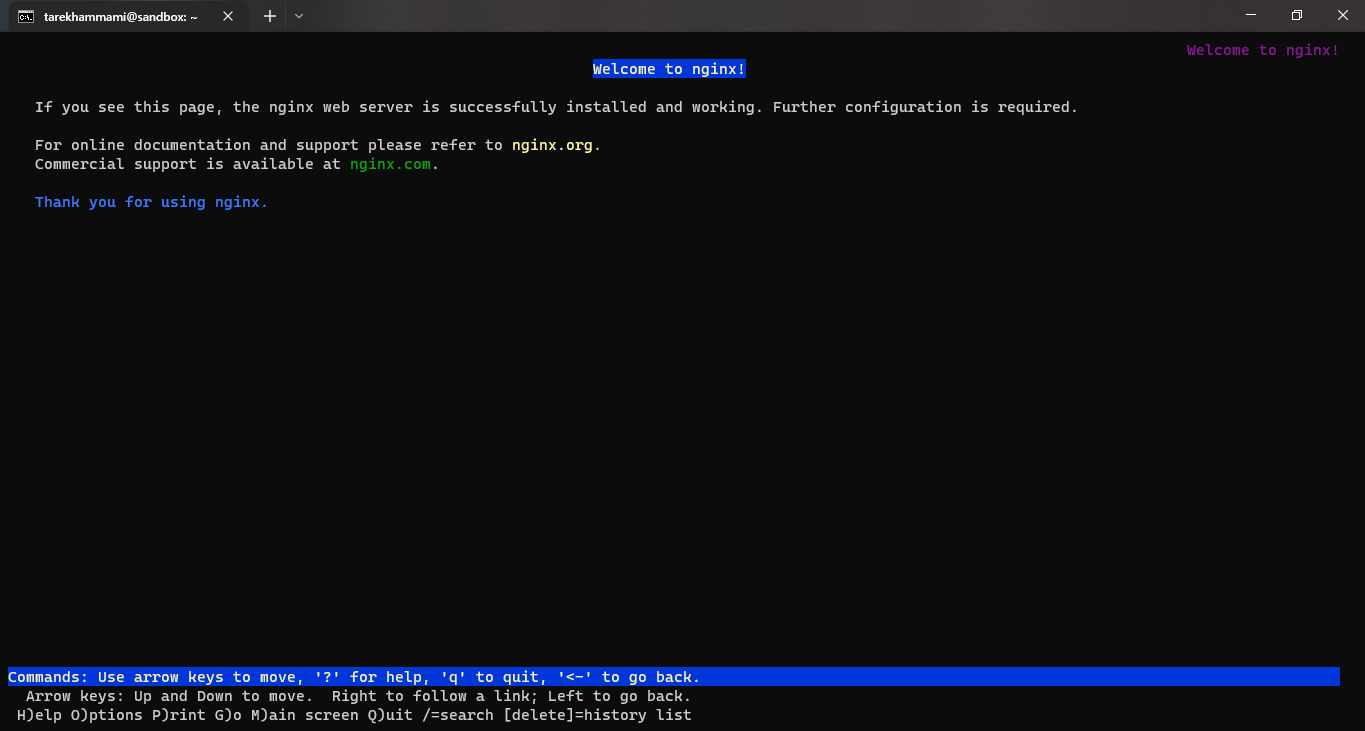
All of this was from inside the terminal, but we want to display it as a web page inside our regular browser, for that we will forward the port 80 of the VM to the port 3080 in the host machine as we did earlier with SSH port forwarding:
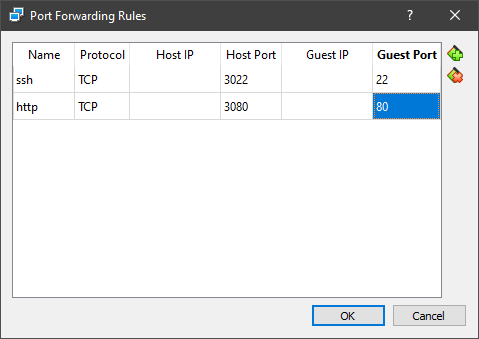
Now save and visit http://localhost:3080 in your browser.
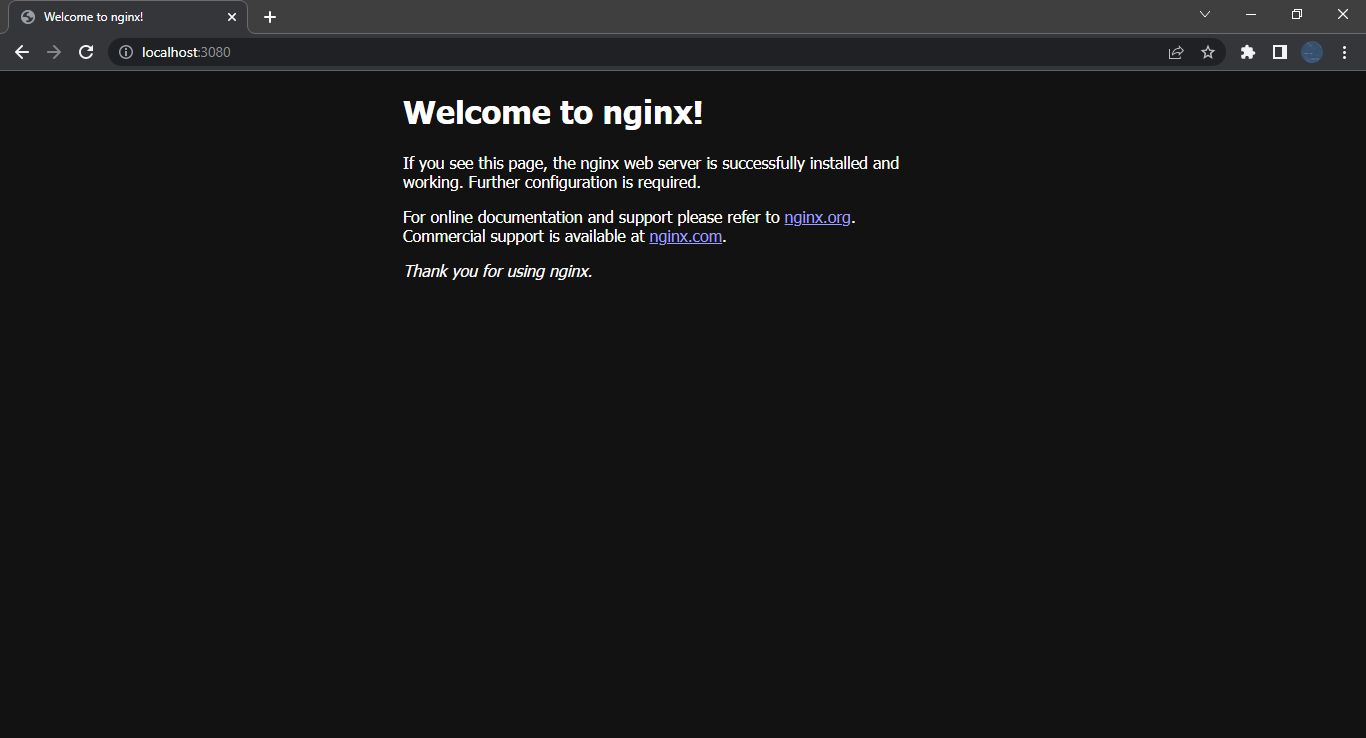
And here we go, a VPS-like experience that you can get free of cost. The only thing left is to clone the VM as per needed, make snapshots of it in order to be able to roll back if something goes wrong, and to expose your host outside of your network and to the outer world to make your apps accessible not only to you.. which all are out of the scope of this tutorial.
Thank you for reading, please like this post and follow me if you find this interesting. See you soon in another post. ^_^